For Ubuntu users, sometimes it’s still confused ‘How to see the Ubuntu version’ that we are using. If we look through the ‘System Settings’ it will not be seen in detail, what version of Ubuntu we are using. For example, we use ‘Ubuntu 18.04.2 / 18.04.1’, surely it will not be read on the system that we are using Ubuntu. Here, How to Check Ubuntu Version using Terminal.
To see in detail, we must look through the terminal. It’s incredibly simple to do, so I’m sure most of you just need a reminder.
Checking Your Ubuntu Version From the Terminal
First open the terminal and type this command.
$ cat / etc / lsb-release
or use this command.
$ lsb_release -c
To see the order in which Ubuntu we use released, type this command.
$ lsb_release -d
or this.
$ lsb_release -r
To see the details, type this command.
$ lsb_release -a

The Gotcha – If You Need the Full Version Number
Wait! Why does it say Ubuntu 16.04.4 in Description and 16.04 in the Release? Which one is it, 18.04 or 18.04.4? What’s the difference between the two?
The short answer is that you are using Ubuntu 16.04. That’s the base image. 18.04.4 signifies the fourth point release of 18.04. A point release can be thought of as a service pack in Windows era. Both 18.04 and 18.04.4 will be the correct answer here.
read also : How to change user passwords on Ubuntu Linux
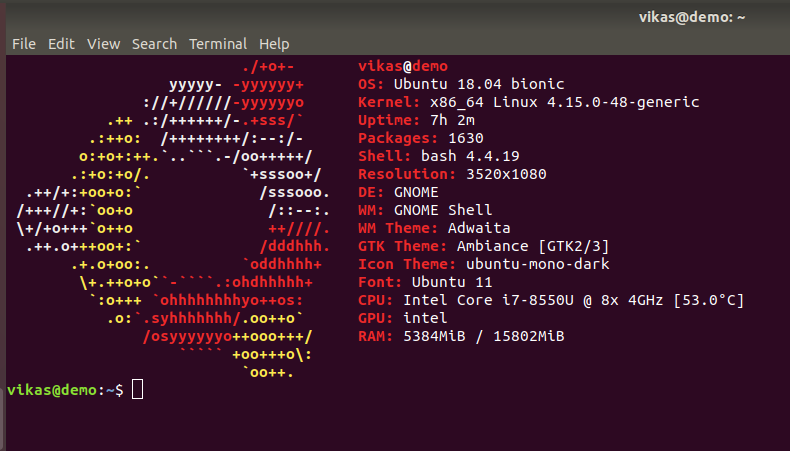
How To Know Ubuntu version using Screenfetch
1. Open Terminal (CTRL + ALT + T) write this code
wget https://raw.github.com/KittyKatt/screenFetch/master/screenfetch-dev

chmod +x screenfetch-dev

./screenfetch-dev
2. 2. Open the files go to the home folder then press CTRL + H, after a few files appear, look for the .bashrc file and open it .. add this in the bottom row after fi
./screenfetch-dev
well after each success you open the terminal screenfetch it will automatically appear like this

I hope it helps you to find Ubuntu version and other system information. If you have suggestions to improve this article, feel free to drop it in the comment section


