Previously I have discussed about How to Configure VLANs in Cisco Packet Tracer With One Switch , now for those of you who are interested in learning about networks, especially on Cisco devices, here are the steps to create a simple network with Cisco packet tracer.
Simple network with Cisco packet tracer
I will create a computer network consisting of:
- 21 computers
- 3 switches
- 1 server
Each switch is connected to 7 computers. And each computer has an IP address with the same level and group. The final display will look like this:
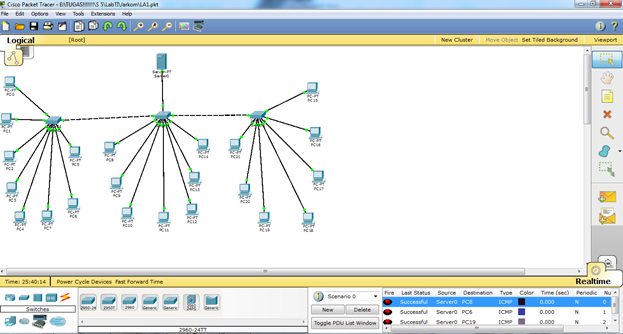
The steps for creating the network above are as follows:
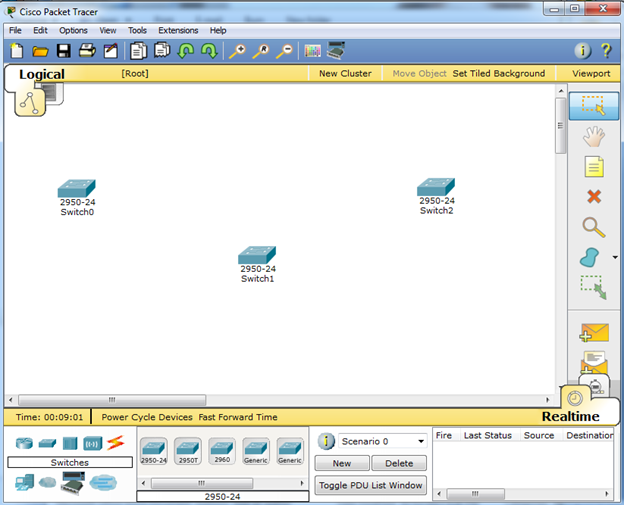
1. Make 3 switches.

The switches can be found in the lower toolbar, in the SWITCHES section. Choose any type, each type represents the types of switches issued by Cisco.
2. Make 7 computers on each switch, so there are 21 computers connected to 3 switches.
The computer can be found on the END DEVICE toolbar.

The arrangement of each computer does not have to be the same as the picture I made, the most important thing is that each computer is connected to the correct switch. After 21 computers have been created, then connect the computers to the switch. Because 2 different devices are connected, use a straight cable as the transmission medium.

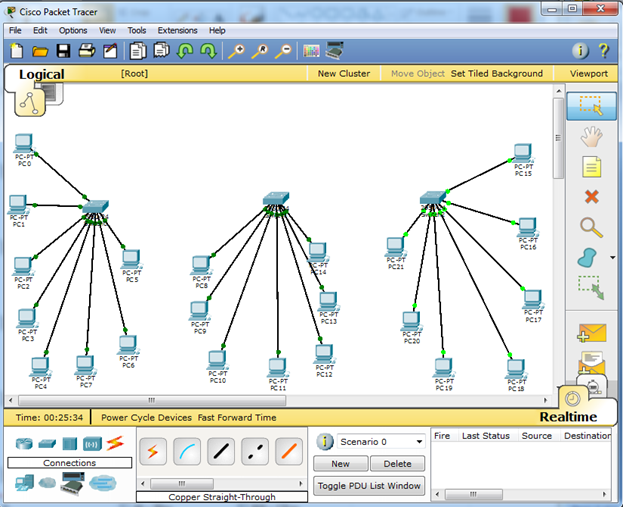
When the computer is first wired to the switch, the green circle on the switch will turn yellow. This indicates that the relationship is still being initialized, if the correct transmission medium is used, over time the indicator will change color to a green circle, but if it is incorrect, it will turn red.
3. Connect each switch with the switch in the middle, consuming the cross cable.
Why the media used cross cable? Because the function of the cross is to connect between the same 2 devices. Cross cables can be found in the CONNECTIONS toolbar.

Just like the explanation above, wait until the indicator turns green, indicating that the connection between the devices is already connected.
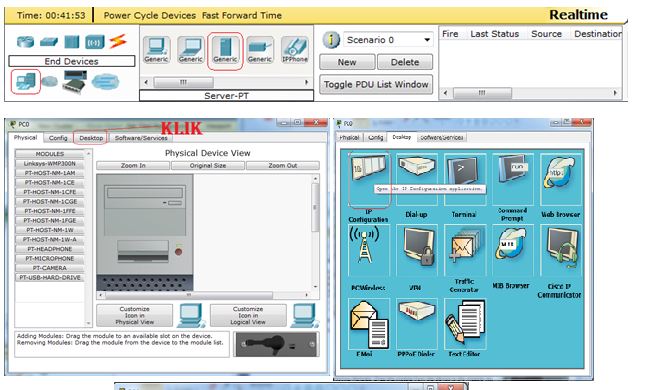
4. Make 1 server that is connected to the switch in the middle.
The server can be found on the END DEVICE toolbar. Connect the server to the switch using a straight cable. The server here can function as data storage (data warehouse) or central processing (all processes are carried out by the server).
The physical setup for the network is complete at this point. All devices are physically connected. To transmit data, a unique address is still needed on each connected computer. This is done so that data is sent according to the target and the switch can determine to which address the data is sent.
There are 2 types of IP addresses:
- static IP
- DHCP (Dynamic IP)
For now we will configure a static IP. The steps are as follows:
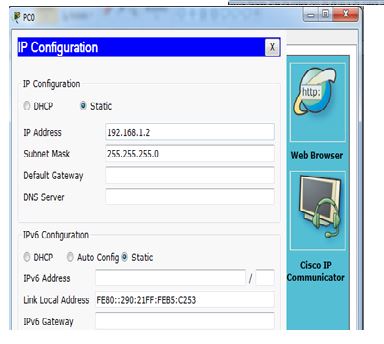
1. Click the computer for which you want to configure the IP address, then a new window will appear,
2. Click the Desktop tab,
3. A menu will appear, select IP Configuration,
4. Fill in the Static IP section with 192.168.1.2 and leave the gateway as default 255.255.255.0 ,
5. For the second computer’s IP, fill it with 192.168.1.3. The third computer fills with 192.168.1.4 and so on until the 21st computer,
6. Repeat steps 1-5 until all computers have different IP addresses.
After all computers have their IP addresses configured, now is the time to find out whether the network is fully formed or not, by pinging the opposite computer. In this way,
1. Click the computer that you want to ping another computer, then a new window will appear,
2. Click the Desktop tab,
3. Enter the Command Prompt menu,
4. And type the command,
Ping 192.168.1.19 IP Address of the destination computer.
5. Ping success indicates the data communication path between the 2 devices is connected and ready to use.
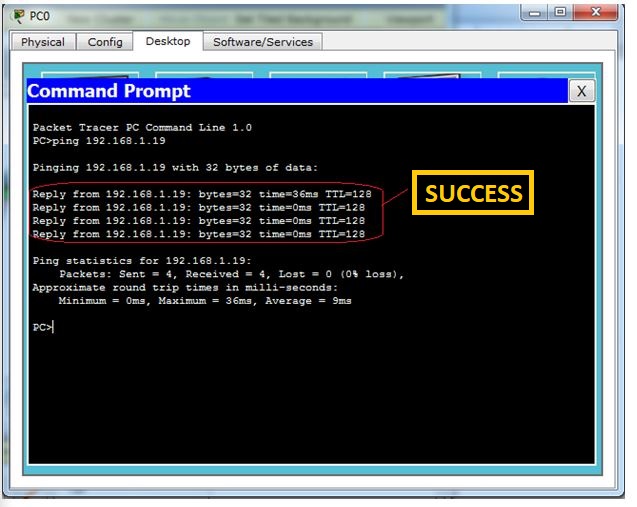
Ping/message display from computers connected to the network.
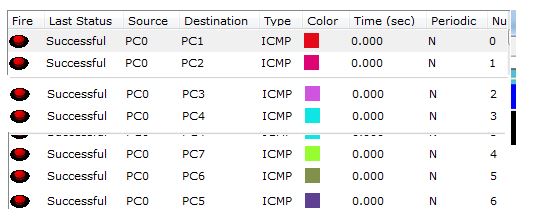
The following image is taken based on PC-0 being the transmitter and all computers other than PC-0 being the receiver.
That’s All, Hope this tutorial how to Create Simple Network with Cisco Packet Tracer will be usefull..
